EVE-NG: Internet Access For Your Labs
This post outlines the changes necessary to give images in your lab internet access. This is accompanied by a step-by-step video series released on Network Collective's YouTube channel.
Published on February 28, 2021 by Tony E.
eve-ng google cloud internet access
3 min READ
This blog outlines one of the questions I’ve been asked the most:
How do I give internet access to my running images?
Ever since I released my video How to run EVE-NG in Google Cloud in 2018, I have been inundated with this question and others. I finally put it all together for you and introduce some new ideas in my video series.
Skill Level Required: Medium
If you already know what to do with these commands then go ahead and get started.
If you don’t know what to do, I created a follow along video, along with other EVE-NG: Tips & Tricks:
Add an IP address to the 2nd bridge interface:
sudo -i

root@eve-ng:~# nano /etc/network/interfaces

# This file describes the network interfaces available on your system
# and how to activate them. For more information, see interfaces(5).

# The loopback network interface
auto lo
iface lo inet loopback

# The primary network interface
iface eth0 inet manual
auto pnet0
iface pnet0 inet dhcp
    bridge_ports eth0
    bridge_stp off

# Cloud devices
iface eth1 inet manual
auto pnet1
iface pnet1 inet static     # <-- Change this to static
    bridge_ports eth1
    bridge_stp off
    address 10.199.199.1    # <-- Create an address
    netmask 255.255.255.0   # <-- Create a subnet mask

[ ... omitted for brevity ...]
Restart Networking:
root@eve-ng:~# systemctl restart networking
Turn on IPv4 Forwarding:
Edit /etc/sysctl.conf as root and uncomment:

# net.ipv4.ip_forward=1

so that it reads:

net.ipv4.ip_forward=1
Force sysctl to read the new values from the file:
sudo -i
sysctl -p /etc/sysctl.conf
Configure iptables to NAT outbound connections:
sudo -i
iptables -t nat -A POSTROUTING -s 10.199.199.0/24 -o pnet0 -j MASQUERADE

# The source "-s ##.###.###.#/##" needs to match the subnet you configured the "pnet1" interface with from above.
Make iptables changes persistent:
Save the current iptables rules (including the new rule we just added) and create a new file for our script:
sudo -i
root@eve-ng:~# iptables-save > /etc/iptables.rules
root@eve-ng:~# nano /etc/network/if-pre-up.d/iptables
Enter this content:
#!/bin/sh
iptables-restore < /etc/iptables.rules
exit 0
Save changes then edit/create next “iptables” file:
root@eve-ng:~# nano /etc/network/if-post-down.d/iptables
Enter this content:
#!/bin/sh
iptables-save -c > /etc/iptables.rules
if [ -f /etc/iptables.rules ]; then
    iptables-restore < /etc/iptables.rules
fi
exit 0
Save changes. Make both files executable:
sudo chmod +x /etc/network/if-post-down.d/iptables
sudo chmod +x /etc/network/if-pre-up.d/iptables
Troubleshooting
The Proper Process
I have had great success with this process:
- Making the above configuration changes to the VM.
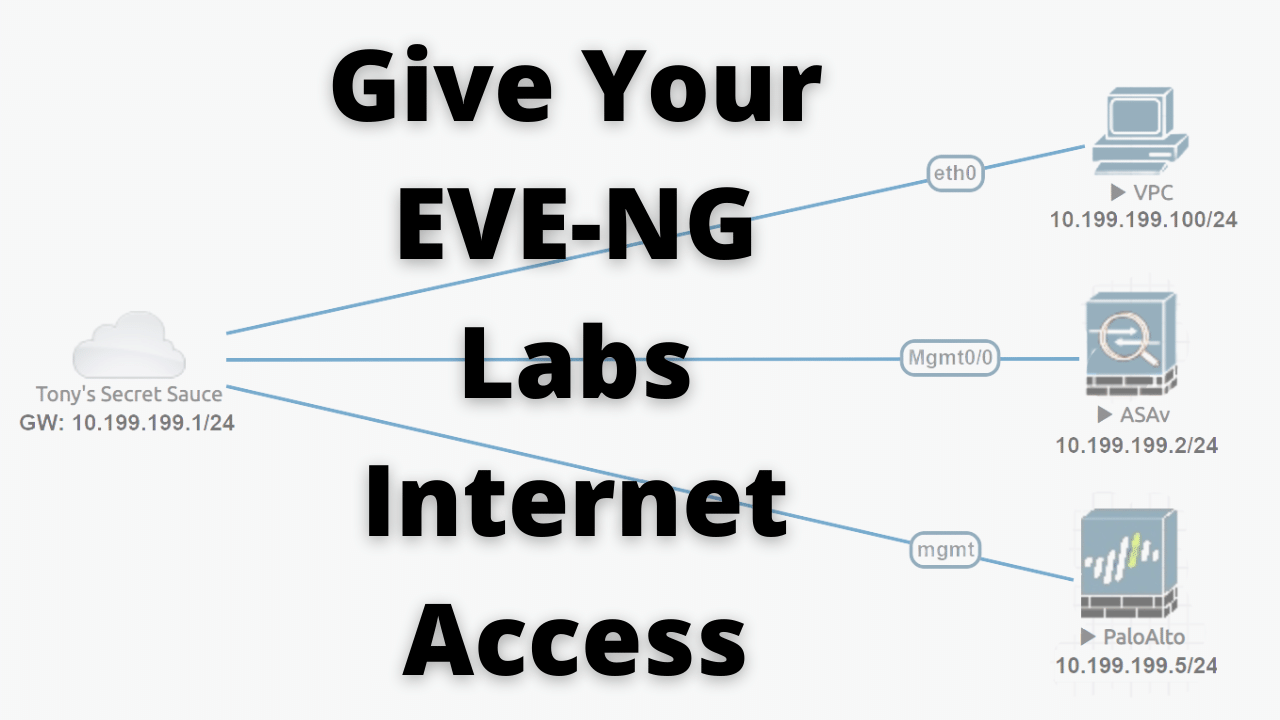
- Adding the Cloud 1 network to your topology.
- Adding any device images.
- Connecting their MGMT interfaces to Cloud 1.
- Power on the device images.
- Configure their MGMT IP address, subnet mask and Default Gateway.
- Ping the Default Gateway
- Ping an external network (8.8.8.8)
Your first test should always verify you can ping your default gateway(pnet1 interface) from your lab images. If you cannot ping your default gateway try these steps:
- Shutdown your lab images conencted to Cloud 1 and restart them. Try to ping the Default GW.
- Delete your Cloud 1 from your topology, save and exit your topology. Launch your topology again and drop in the Cloud 1 network again, reconnect it to the device images mgmt interfaces and start the device images.